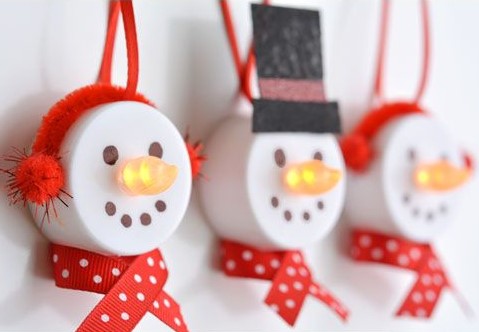
Tea Light Snowman
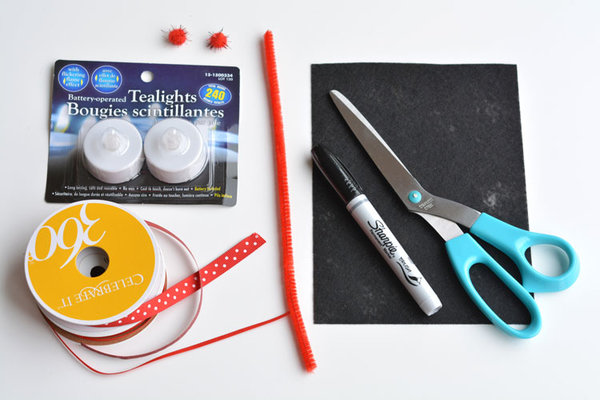
Materials
· Battery operated tea lights
· A Black Sharpie
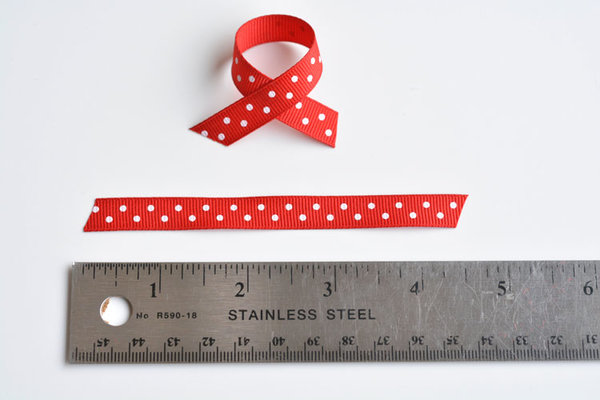
· Red Ribbon
· Red Pipe Cleaners
· Red Pom Poms
· Black Felt
· Orange Sharpie
· Glue Gun
· Scissors
Instructions
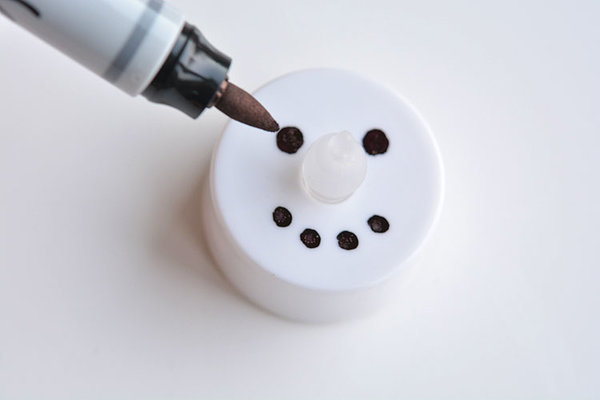
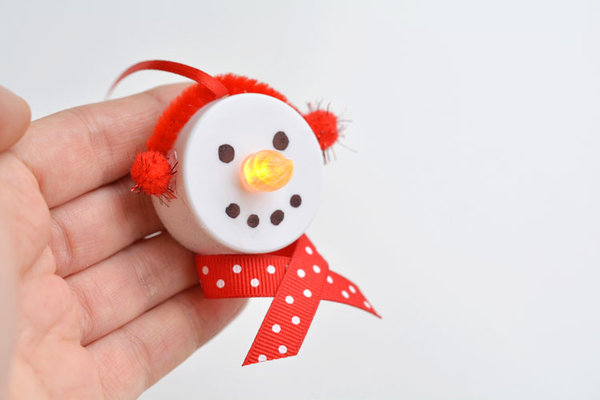
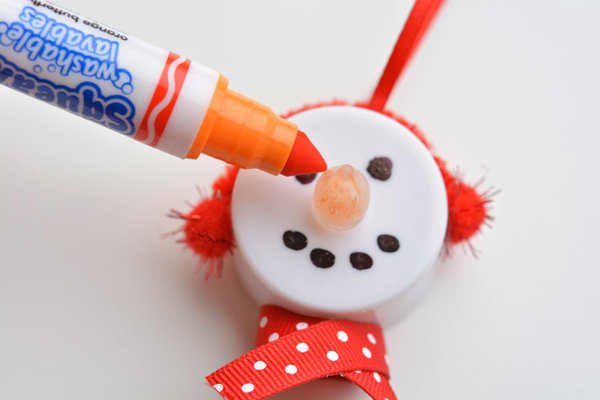
1. Use the black Sharpie to draw a simple face onto the tea light. You can use googly eyes if you want, but I preferred the look of the black dots.
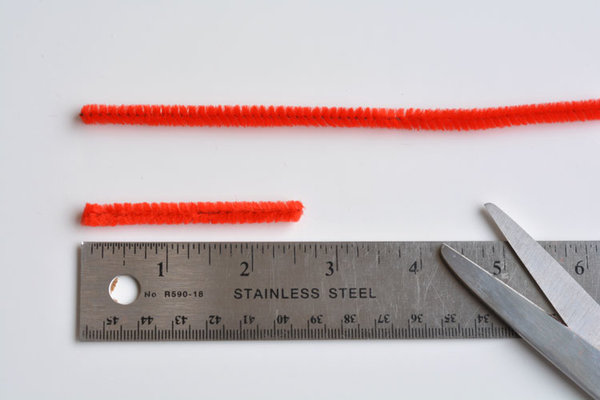
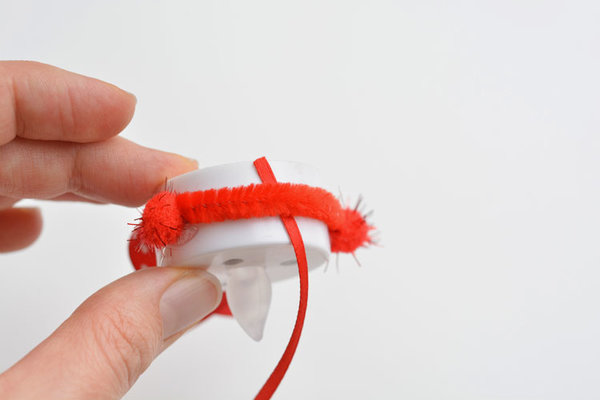
2. Cut a piece of red pipe cleaner to approximately 2.5″ long.
3. Curve it around the tea light and then add a small line of hot glue on both ends to hold it in place. Don’t glue it the entire way around because you’ll need to be able to slide the ribbon under the pipe cleaner later.
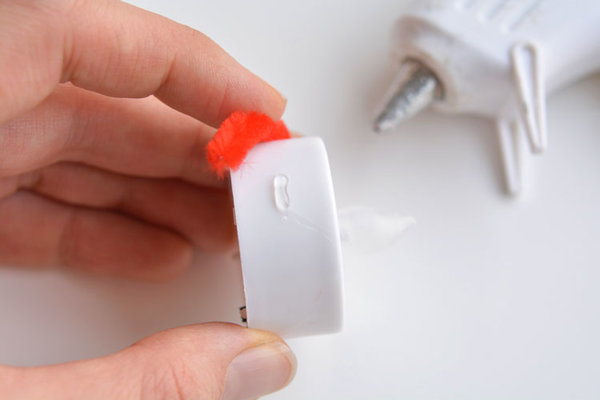
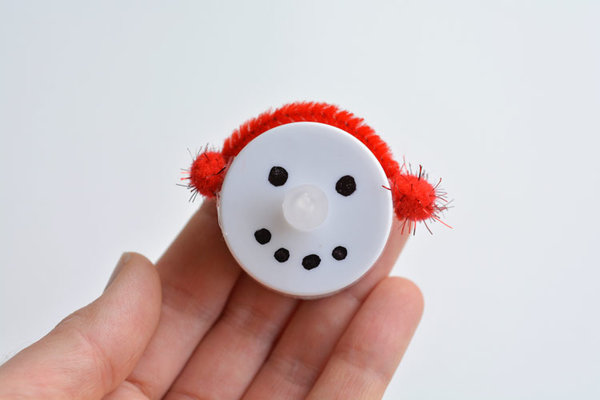
4. Add a generous dab of hot glue where the ears would be and add the pom poms. Now your snowman has ear muffs!
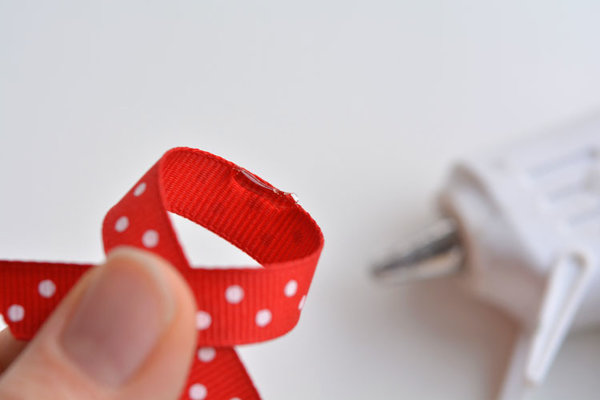
5. Cut out a piece of ribbon to be approximately 4.5″ long. Then cross it over itself like in the picture below and add a small dab of hot glue to hold it together. I found this was the best way to make the ribbon look like a scarf.
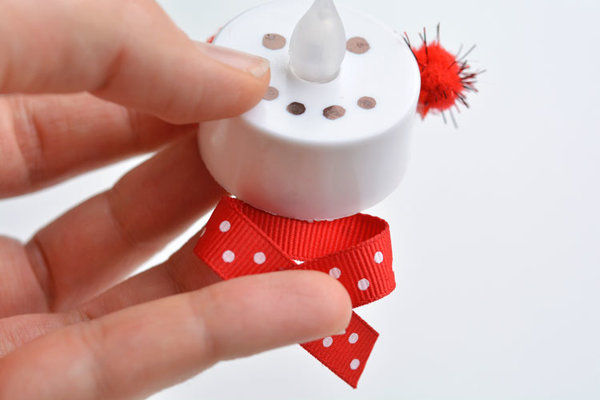
6. Add a small line of glue to the back of the “scarf” like in the picture below:
7. And then glue it to the back of the tea light like in this picture:
8. The scarf should naturally pop back to the position shown below without adding more glue.
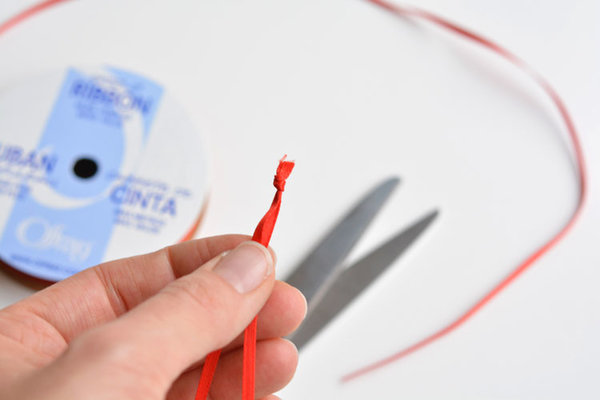
9. Cut a piece of the thinner red ribbon to be approximately 11″ long and then slide it under the pipe cleaner.
10. Then tie a tiny knot in the ribbon to keep it together.
11. The tea light flame is white when it’s turned off so you’ll probably want to color it orange with a marker to make it look like a carrot, even when the tea light is turned off.
12. I definitely recommend using an orange Sharpie for this next part. I didn’t have one, so I had to resort to using one of the kids Crayola markers. It worked for the time being, but it rubs off really easily, so it’s not going to last very long.
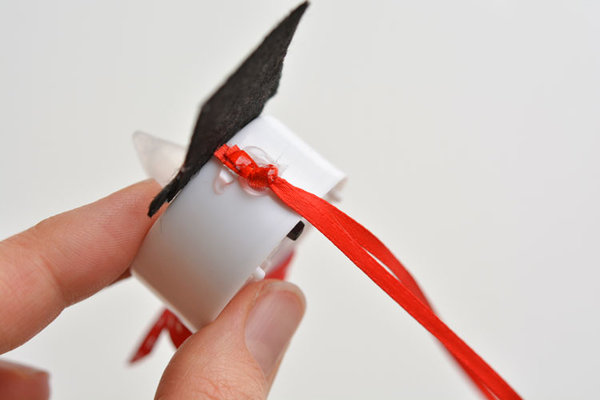
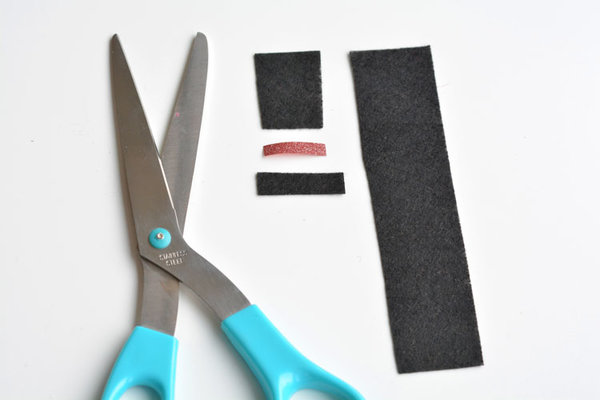
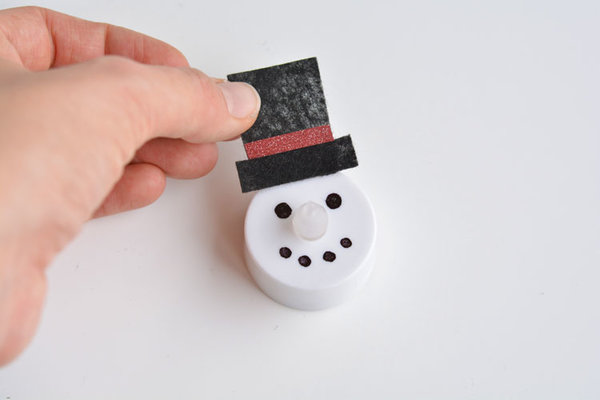
13. Since a little variety is always fun, I also made a little snowman with a top hat. I cut a strip of black felt to be approximately 1-1/4″ wide. And then I cut pieces like in the photo below. The ribbon is just a scrap of gift wrapping ribbon I had.
14. Glue the hat together with some hot glue, so you end up with something like this:
15. Since there’s no pipe cleaner to hold it in place on this one, you’ll need to glue the ribbon right to the tea light. Add a generous dab of hot glue to the tea light, add the ribbon, and then add another generous dab of hot glue, and it should keep it all in place.